Sharepoint Designer 2013 Workflow App Step Disabled
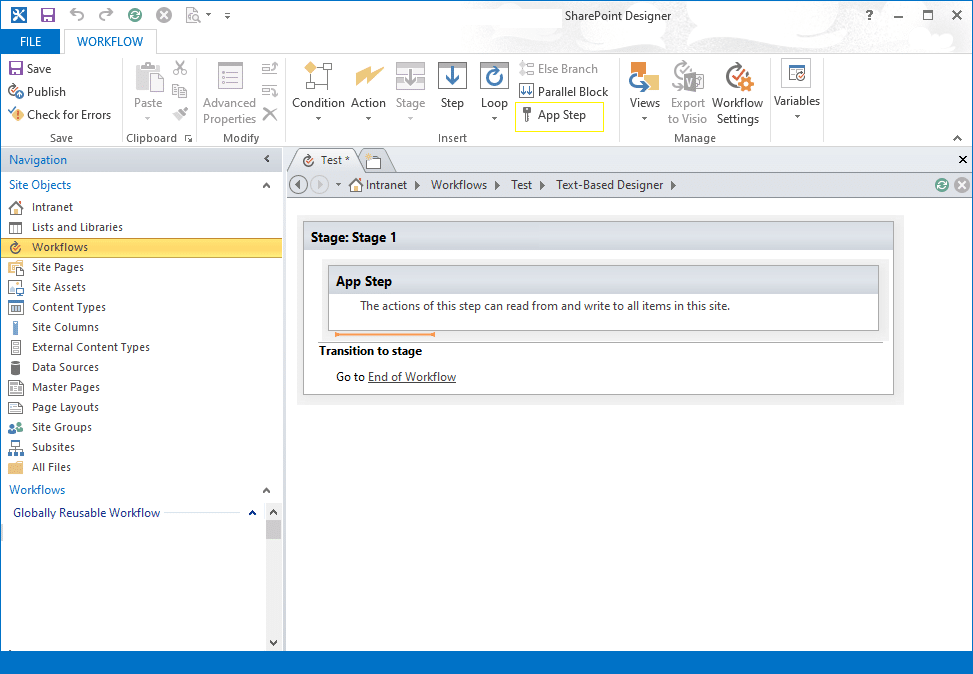
Problem: "App Step" is grayed out in SharePoint Designer Workflow!

What is App Step in SharePoint?
SharePoint Designer workflows get executed from the context of the user who initiated the trigger – started the workflow. E.g. If a workflow gets triggered on new item creation, it gets executed from the context of the user who created that item. However, at times, we may need to perform operations to which the current user may not have rights. An App step in SharePoint designer workflow resolves this issue by running the workflow step from the context of "Workflow App" which has full rights on the site so that the workflow can perform operations in elevated permission mode. For E.g. Setting access rights can't be performed by a user with contributor rights, isn't it? When you place that step inside "App Step", it gets executed from Workflow App's context.
Step 1: Activate "Workflows can use app permissions" Site Feature
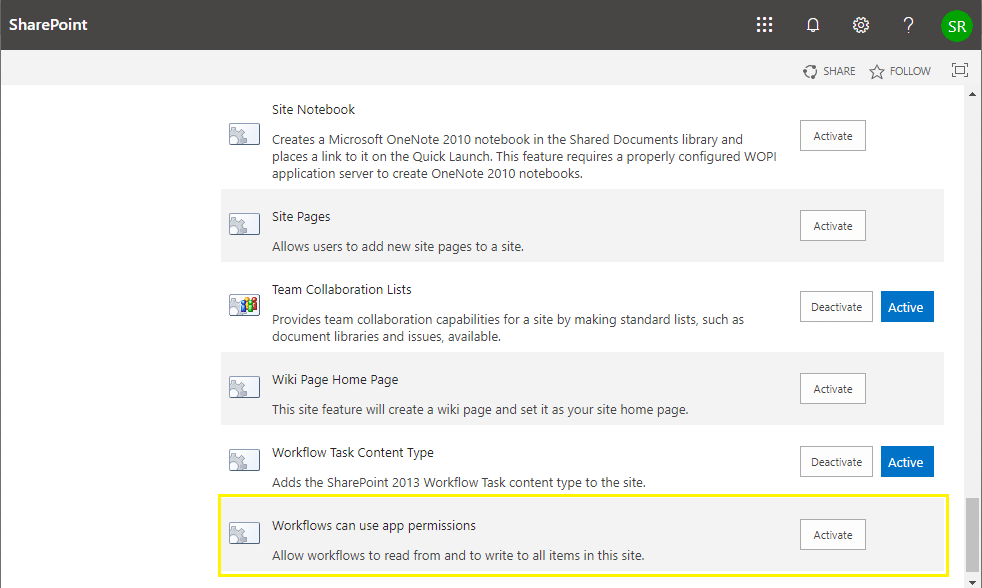
As a first step, The feature "Workflows can use app permissions" needs to be activated.
- Go to Site Settings of the site in which you are creating workflow >> Click on the "Manage Site Features" link under the Site Actions group
- On the Site Features page, scroll to the bottom of the page and click on the Activate button next to the "Workflows can use app permissions" feature, if it's not activated already.

Step 2: Grant Permission to Workflow App
Once the feature is activated, the next step is to grant FULL Control permission to the workflow app on the site. Follow these steps:
Get the Workflow App ID:
We need the workflow App ID to grant access to it:
- Go to Site Settings >> Under "Users and Permissions" group click on "Site App Permissions" link
- Locate the "Workflow" and copy the GUID between the | and the @ symbols. E.g. here in my case "705d3e7a-e387-4561-969e-bcp125f268829a"

Grant Access to Workflow App
Once you obtained the workflow App ID, the next step is to grant access to it.
- Navigate to the Grant Permission to an app page by browsing the appinv.aspx page of the site. Example: http://yourtenant.sharepoint.com/SiteCollection/_layouts/15/appinv.aspx
- Enter the Workflow APP ID copied in the previous step >> Click on the "Lookup" button. SharePoint fills other fields except "Permission Request XML"
- Paste the below XML in Permission request and click on the "Create" button to grant permission to the Workflow App.
- Click on "Trust It" to complete granting access to the Workflow App ID.

Restart SharePoint Designer. Create or edit any SharePoint 2013 Workflow and the App Step should be enabled!

MSDN Reference: https://docs.microsoft.com/en-us/sharepoint/dev/general-development/create-a-workflow-with-elevated-permissions-by-using-the-sharepoint-workflo?redirectedfrom=MSDN
Salaudeen Rajack
Salaudeen Rajack is a SharePoint Architect with Two decades of SharePoint Experience. He loves sharing his knowledge and experiences with the SharePoint community, through his real-world articles!
Sharepoint Designer 2013 Workflow App Step Disabled
Source: https://www.sharepointdiary.com/2019/08/fix-app-step-disabled-in-sharepoint-designer-workflow.html
Posted by: taylorshantoote1978.blogspot.com

0 Response to "Sharepoint Designer 2013 Workflow App Step Disabled"
Post a Comment